Quickstart: From Zero to DEM in 1 arc-second#
Welcome to Globato, the continuous DEM generation framework. In this guide, we will go from installing the software to generating a production-ready Coastal Digital Elevation Model (DEM) of San Diego, California, in just a few terminal commands.
Prerequisites#
Globato requires Python 3.12+. We highly recommend doing this inside a clean virtual environment (like conda or venv).
pip install globato
Step 1: Discovering Recipes#
Globato uses Recipes (YAML configuration files) to define how data is downloaded, filtered, stacked, and interpolated. You don’t have to write these from scratch! Globato ships with curated recipes out of the box.
Let’s see what is available:
globato recipes list
You should see quick_coastal and crm_standard in the list.
If you want to know exactly what a recipe does before you run it, you can inspect it:
globato recipes info quick_coastal
Note: quick_coastal is a fast recipe that pulls raster-based elevation data to keep the fetching and processing fast.
Step 2: Running a Curated Recipe#
Let’s run the quick_coastal recipe. Globato’s geographic engine is smart enough to understand place names, so we don’t even need to look up bounding box coordinates. We just use the -R (Region) flag and prefix our search with loc:. Since by default the quick_coastal recipe will generate a DEM at 3 arc-seconds, lets increase the output resolution to 1 arc-second.
globato cudem run quick_coastal -R loc:"portland, me -E 1s"
What just happened?
Globato queried the loc:”portland, me” geocoder and grabbed the bounding box.
It dispatched the fetchez engine to download elvation and bathymetry data for exactly that area.
It downloaded OpenStreetMap coastline vectors to act as a barrier.
It dynamically stacked, interpolated, and cropped the data into a seamless grid.
It generated a colorized hillshade (_hillshade.tif) for immediate viewing.
Check your current directory; you should see your brand new quick_coastal directory with the output DEM ready to load into QGIS or ArcGIS!
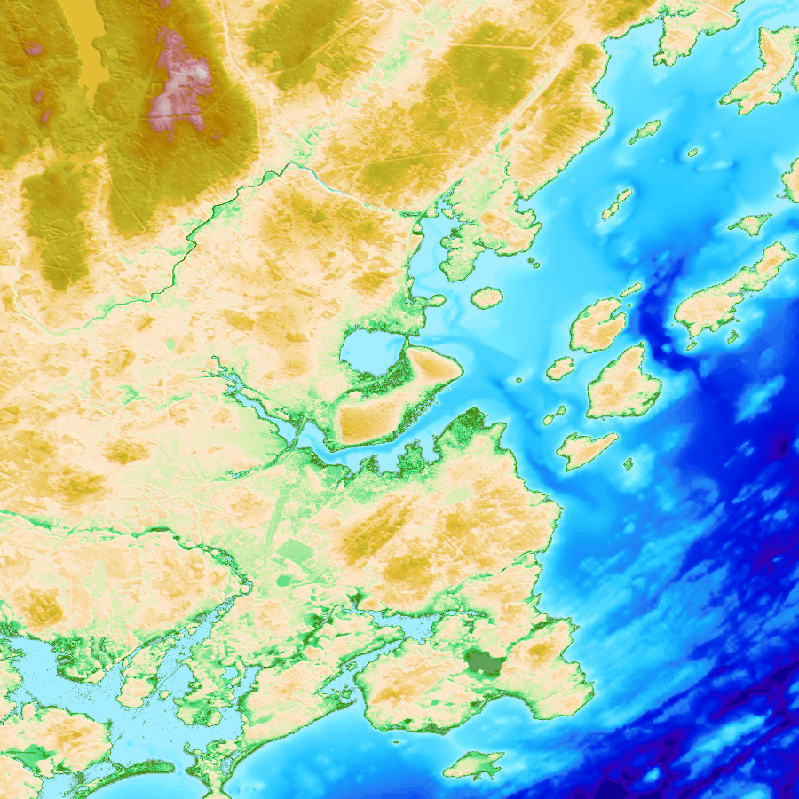
(Above: The just generated DEM of Portland, Maine)
Step 3: Building a Custom Recipe On-the-Fly#
What if you want to build a DEM using completely different data, but don’t want to hand-write a YAML file? You can use the build command to string sources together instantly.
Let’s build a DEM using USGS 3DEP topography and NOAA MBDB (Multibeam) bathymetry.
globato cudem build -R loc:"San Diego" tnm:datasets=3/4 mbdb -E 1s
Globato will output a custom San_Diego_recipe.yaml file into your directory and immediately execute it.
(Above: The just generated DEM of San Diego, California)
Step 4: Adding Data Filters (Hooks)#
Raw data is rarely perfect. Globato allows you to attach processing “hooks” directly to your data sources using a plus (+) sign.
Let’s rebuild that San Diego DEM, but this time, let’s pass the NOAA Multibeam data through the rq (Raster Query) filter to clean up noisy data points before it gets gridded and lets also remove hydro-flattened regions from the national map DEMs using the raster_flats hook.
globato cudem build -R loc:"San Diego" tnm:datasets=3/4+raster_flats mbdb+rq:threshold=10,mode=percent -E 1s
(Above: The just generated DEM of San Diego, California)
Next Steps#
Congratulations! You have successfully executed a curated recipe, generated a custom YAML on the fly, and applied an inline data filter.
Check out the CLI Syntax Guide to master how to chain hooks together.
Read the Hooks Directory to see all the filters and algorithms available to you.
Learn how to process local data in the Local Files Tutorial.